Install Jenzabar CX 10 for Windows
NOTE:
- The desktop version of Jenzabar CX will not run on wireless networks (including Pomona wireless) or VPN. You must be on campus and connected via Ethernet for the software to connect properly.
- To install Jenzabar CX 10 in the Mac OS, please click here.
- If you need to use Jenzabar CX while off campus, please use the CX Desktop in Azure Virtual Desktop. If you do not see a CX Desktop available, please contact ITS for assistance.
The instructions below will show one how to install Jenzabar for Windows for a single user on a computer OR for All Users of a computer.
Jenzabar for Windows (for a Single user)
-
Please click here to download the latest Jenzabar CX installer and the 'cx_config.ini' file .
Authenticate your Pomona College credentials.
- Run the downloaded installer.
- Click Next.
- Use the default installation path for 'Choose Installation Directory'. Click Next.
- The Start Menu shortcut should default to Jenzabar (leave it as is). Click Next.
- Click Next and then Install.
- Once the install completes, don't run the software yet . Uncheck the 'Run Jenzabar CX Desktop now' option. Then, click Finish.
- Navigate to the 'C:\ProgramData' folder.
NOTE:
If you do not see ProgramData you will need to show hidden files or manually enter the full path in the File Explorer address bar.
- Create a new folder in C:\ProgramData and name it 'Jenzabar'.
- Move the downloaded 'cx_config.ini' file to C:\ProgramData\Jenzabar\ .
- Launch Jenzabar using the icon in the Start menu.
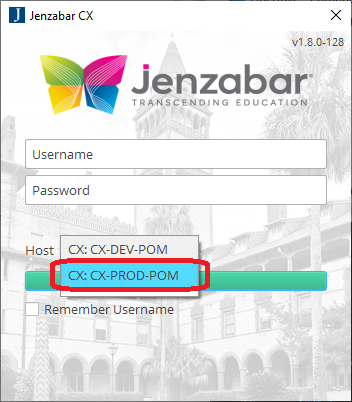
- If not already set, change the Host option to 'CX: CX-PROD-POM' . Then, log in using your CX credentials.
Jenzabar for Windows (for All Users of a computer)
-
Please click here to download the 'jenzabar_cx_installer-1_8_0_128.exe' and the 'cx_config.ini' file .
Authenticate your Pomona College credentials.
- Run the downloaded installer.
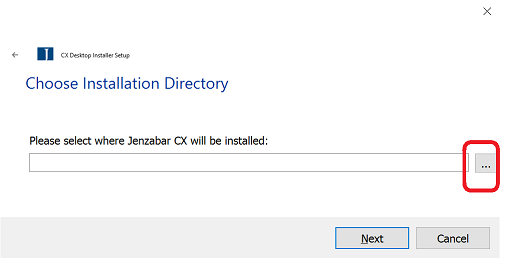
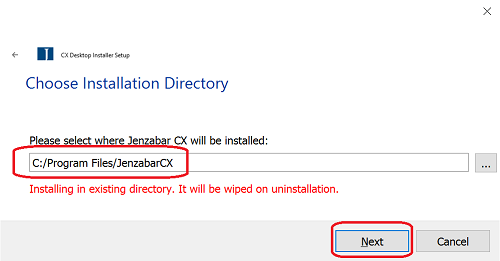
- For the 'Choose Installation Directory' path, use C:\Program Files\JenzabarCX .
- Click the '…' to change to this path.
- Enter C:\Program Files\ in the folder path of the 'Select Folder' windows. Then, click the Select Folder button.

- Manually create a 'JenzabarCX' folder in the Program Files directory. Perform a right-mouse-button click on a blank space in the right pane, select New and then Folder.
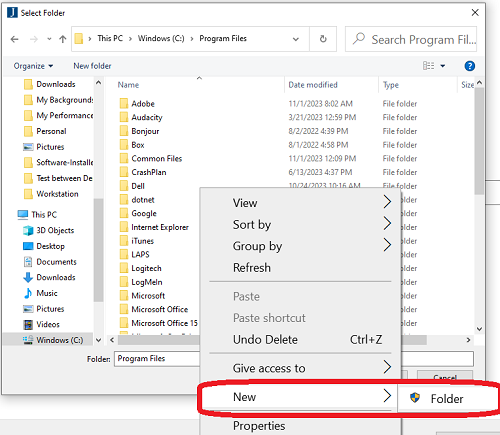
- Name the new folder JenzabarCX. Then, click the 'Select Folder' button.
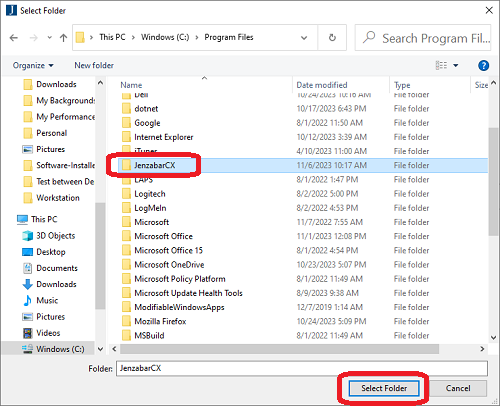
- Confirm the correct file path of C:\Program Files\JenzabarCX . Then, click Next.
NOTE:
If you see the warning 'Installing in existing directory', ignore it.
- The Start Menu shortcut should default to Jenzabar (leave it as is). Click Next.
- Click Install.
- Once the install completes, don't run the software yet . Uncheck the 'Run Jenzabar CX Desktop now' option. Then, click Finish.
- Navigate to the 'C:\ProgramData' folder.
NOTE:
If you do not see ProgramData you will need to show hidden files or manually enter the full path in the File Explorer address bar.
- Create a new folder in C:\ProgramData and name it 'Jenzabar'.
- Move the downloaded 'cx_config.ini' file to C:\ProgramData\Jenzabar\ .
- Launch Jenzabar using the icon in the Start menu.
- If not already set, change the Host option to 'CX: CX-PROD-POM' . Then, log in using your CX credentials.
