Kaltura Playlists
If you have videos that you want students to watch in succession or you wish to group videos by type because you have a lot of videos in the course, you can create a playlist in Kaltura after uploading your videos. Playlists allow students to watch a series of videos more easily. For example, if you have a handful of video clips that you would like students to watch back-to-back, a playlist puts them together so that students do not need to search through the entire video list to find each one and then watch them separately.
-
Either click on Pomona Kaltura Media Gallery in your Sakai or Canvas course menu or log into mediaspace.pomona.edu and click on your Media Gallery
-
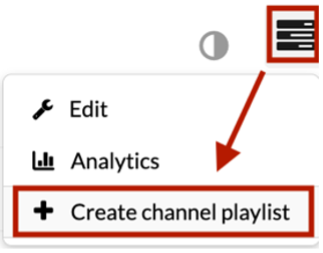
In the upper-right corner, click on the Channel Actions button (three horizontal bars) to reveal a drop-down menu and choose Create channel playlist.

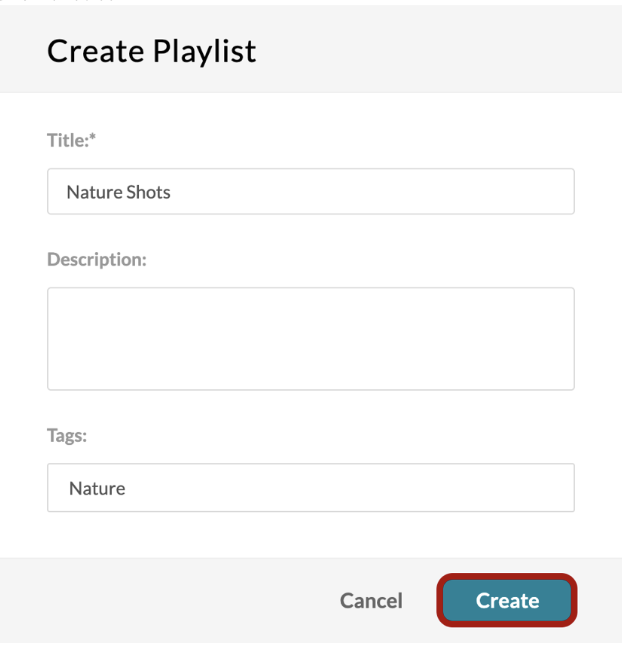
- Type a name for your playlist in the Title field.
- If desired, add a description and tags.
-
Click the Create button.

Add Items to the Playlist
You can now choose from the media you uploaded to create a playlist for your course. You will notice that you can select from all of your media, not just the ones published to that course’s gallery. If you select a video that is not yet published to that course’s gallery, it will change to published once included in a playlist for the course.
-
On the Add Items to Your Playlist screen, click on the add icon (
 ) next to any of the videos you want to include in your playlist.
- The plus sign will change to a checkmark when the video has been added, and it will also appear in the Playlist column on the right.
-
You can drag and drop the videos on the Playlist column to organize them as you desire.
Note: As you first create the playlist, your changes will be saved automatically, so you can navigate away when ready.
You have now created a playlist and can repeat the steps to create another if desired.
Now that you have playlists in your course’s Media Gallery, the student view will be different than before. By default, they will enter on Home, which will now display your playlists. However, they can still click on the Media tab to view all media published in the course. If you are using both, you will want to clarify access instructions for students.
The following screenshot shows the student view when there are playlists in a course’s Media Gallery. The dashed line indicates where students would access all of the course’s media.
The next screenshot shows the student view after clicking on a playlist and how the videos are queued up for easy back-to-back viewing.