Scheduling Privileges in Zoom
https://support.zoom.us/hc/en-us/articles/201362803-Scheduling-Privilege
Zoom is a cloud-based meeting tool which combines video conferencing, online meetings, and mobile collaboration into one platform. Its dependable, high-quality and easy to use design have made it so much easier for groups around the world to connect and collaborate.
If you experience issues with Zoom, you may refer to the additional documentation or contact the ITS help desk at 909-621-8061 or servicedesk@pomona.edu. Additional documentation is available via Pomona College ITS at https://ritg.pomona.edu/resources/instructional-continuityor the Zoom online knowledgebase: https://support.zoom.us/home.
Zoom allows you to assign people to schedule meetings on your behalf.
Assigning Scheduling Privileges
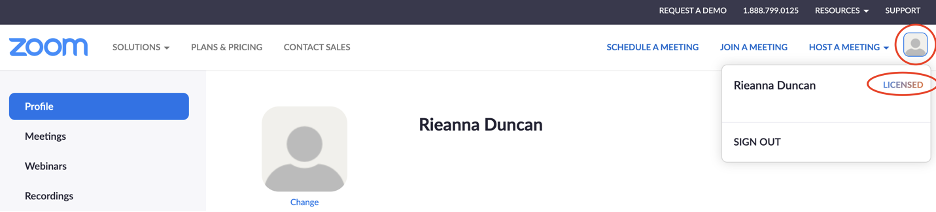
Sign into your Zoom web portal.
Click the icon next to “Host a Meeting. Make sure you and your scheduler have been assigned “Licensed” or “On- Prem.”
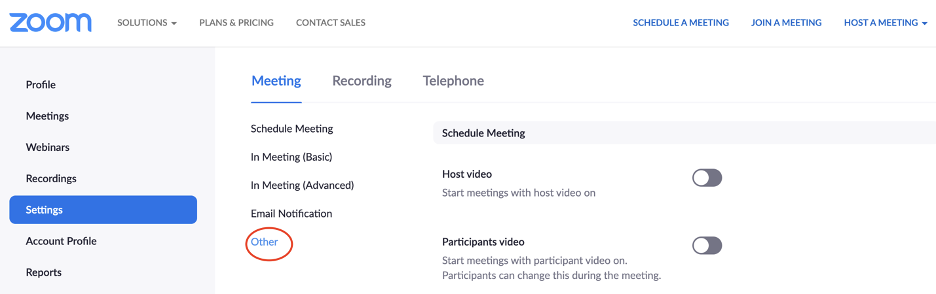
3. Click “Settings,” then, “Other.” Scroll until you see a section titled, “Scheduling Privileges.”
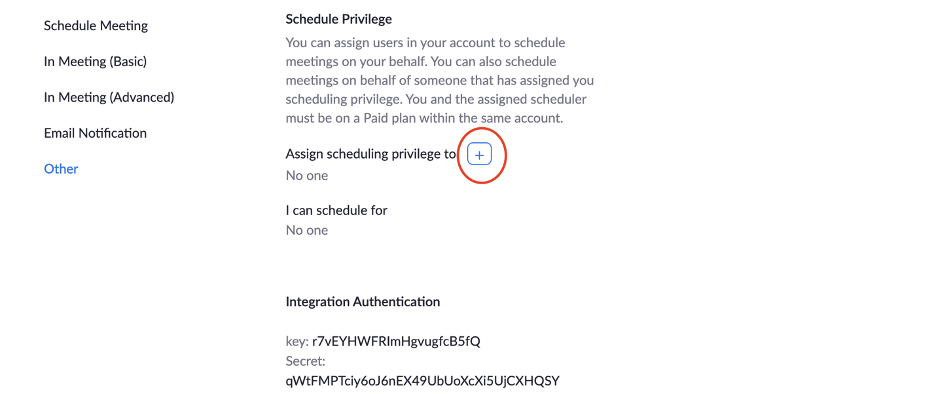
4. Click the “+” icon next to “Assign scheduling privilege to.
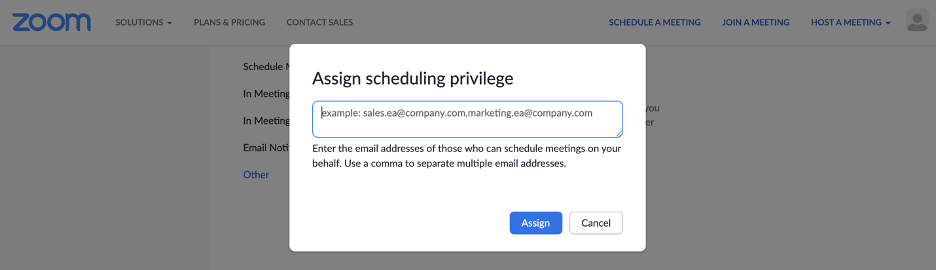
5. Type in the desired email(s). Click “Assign.”
Scheduling a Meeting
Sign into your Zoom web portal account.
Click “Meetings.”
Click “Schedule a New Meeting.
Adjust the title, description, date, time, etc. accordingly.
Scroll to “Schedule For.” Click the arrow to the right of the box.
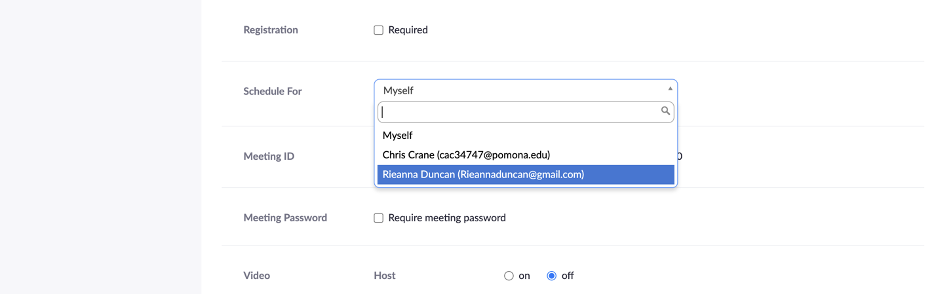
6. Select the name of the person you’re scheduling the meeting for.
7. Click Save.
Troubleshooting
Check to ensure that your account and the person you’re assigning scheduling privileges to are listed as “Licensed” or “On-Prem.”
If you can’t see any changes in the section labeled, “Assign scheduling privilege to,” sing out, then sign back in.
Check to ensure your Chrome/Firefox plug-in, G Suite add-on, or Outlook add-in is updated.